What equipment do you need to make good videos?
When you’re first starting to make videos, figuring out what equipment you need can be a bit overwhelming.
When I was first getting started in making videos, I often felt the pressure to buy the nice and fancy equipment that would give me the “best quality” video or audio.
But before you go on a spending spree, there are some questions you should ask yourself when looking at making a big purchase, especially when you’re first getting started:
Do I KNOW I’m going to continue to make videos?
If you’re not sure, then don’t go out and buy all the fancy equipment just yet.
Do I NEED to have this piece of equipment to make the video I’m trying to make?
Sure, it’d be nice to have the fanciest gadget, but is it absolutely necessary to get the quality you need for the video you’re making?
Will I CONTINUE to use this piece of equipment in the future?
I get it. Sometimes you buy something, use it once or twice, and then stop using it (for any number of reasons). But thinking about whether this is a piece of equipment you’ll continue to use in the future might help you decide if it’s worth buying now.
Here’s the thing:
You can make good videos without spending a fortune.
Because technology has advanced so far so fast, the noticeable differences between the camera on your phone, and the fancy cameras that you can spend hundreds/thousands of dollars on, are shrinking rapidly.
Are there differences between the phone camera and the fancy camera? Sure. Is it nice to have more customization on the nicer camera? Yes. Do you need to spend a fortune on a good camera as you’re getting started to make good videos? Heck no.
So, where do you start?
I encourage people who are just starting out to use the equipment they already have readily available, or items that are relatively inexpensive, until they KNOW they’re going to continue to make videos on a regular basis.
Here’s my recommended “starter pack” of equipment:
Photo by Angela Compagnone on Unsplash
Camera phone
Let’s be real, the iPhone (or Android) cameras are pretty excellent quality. They might not have amazing zoom, white balance, or other more advanced features you might want to be able to adjust, but for many kinds of filming you’ll be doing when just starting out, the camera on your phone or tablet will serve you quite well.
Lav mic
If you’re going to spend money on anything early on in your filming adventures, buy a decent microphone. I have a couple of these little lavalier microphones from Power DeWise that plug into the headphone jack (or adapter) for your phone and record audio directly into your video recorder as you record. It’s about $20-$25 on Amazon, and I use mine all the time.
Photo by Aaron Burden on Unsplash
Tripod
When I’m filming with my iPhone, I use this little phone tripod, which cost me like $15 on Amazon. If you don’t want to spend the $15, then you can DIY a stack of books to prop up your phone and hold it steady while you film (I’ve done this too!)
What do I use?
People often ask me about the video equipment I use when filming. Keep in mind, I’ve been making videos for 5+ years now, and I’ve slowly added items to my collection, so this is by no means my suggestion for what a new creator should run out and buy.
I’ve highlighted the items that I use most often when filming these days.
Video
Camera - Canon T5i DSLR; occasionally my iPhone
This is my primary camera for my vlog style video shoots, and I’ve used it for other client videos as well. It’s probably a bit outdated as I got it about 4 years ago now, but the nice thing about getting a good quality DSLR, is that you can switch out the lenses (which I’ve done) to up your quality without buying a whole new camera. (See below for more on lenses.)
Camera Lenses - Tamron 18-270mm F/3.5-6.3; Canon EF-S 18-135mm F 3.5-5.6
You can stick with the standard “out of the box” lens that comes with a DSLR and that will serve you fine, but if you want a little more zoom, or a quiet auto focus, or other next level features, you might want to look into getting a different lens to go with your camera.
Most online video creators have a couple of lenses they can swap in and out of their DSLRs depending on the kind of shoot they’re doing. I find I use my Canon replacement lens a lot these days, but my Tamron is still really solid lens to have.
Lighting
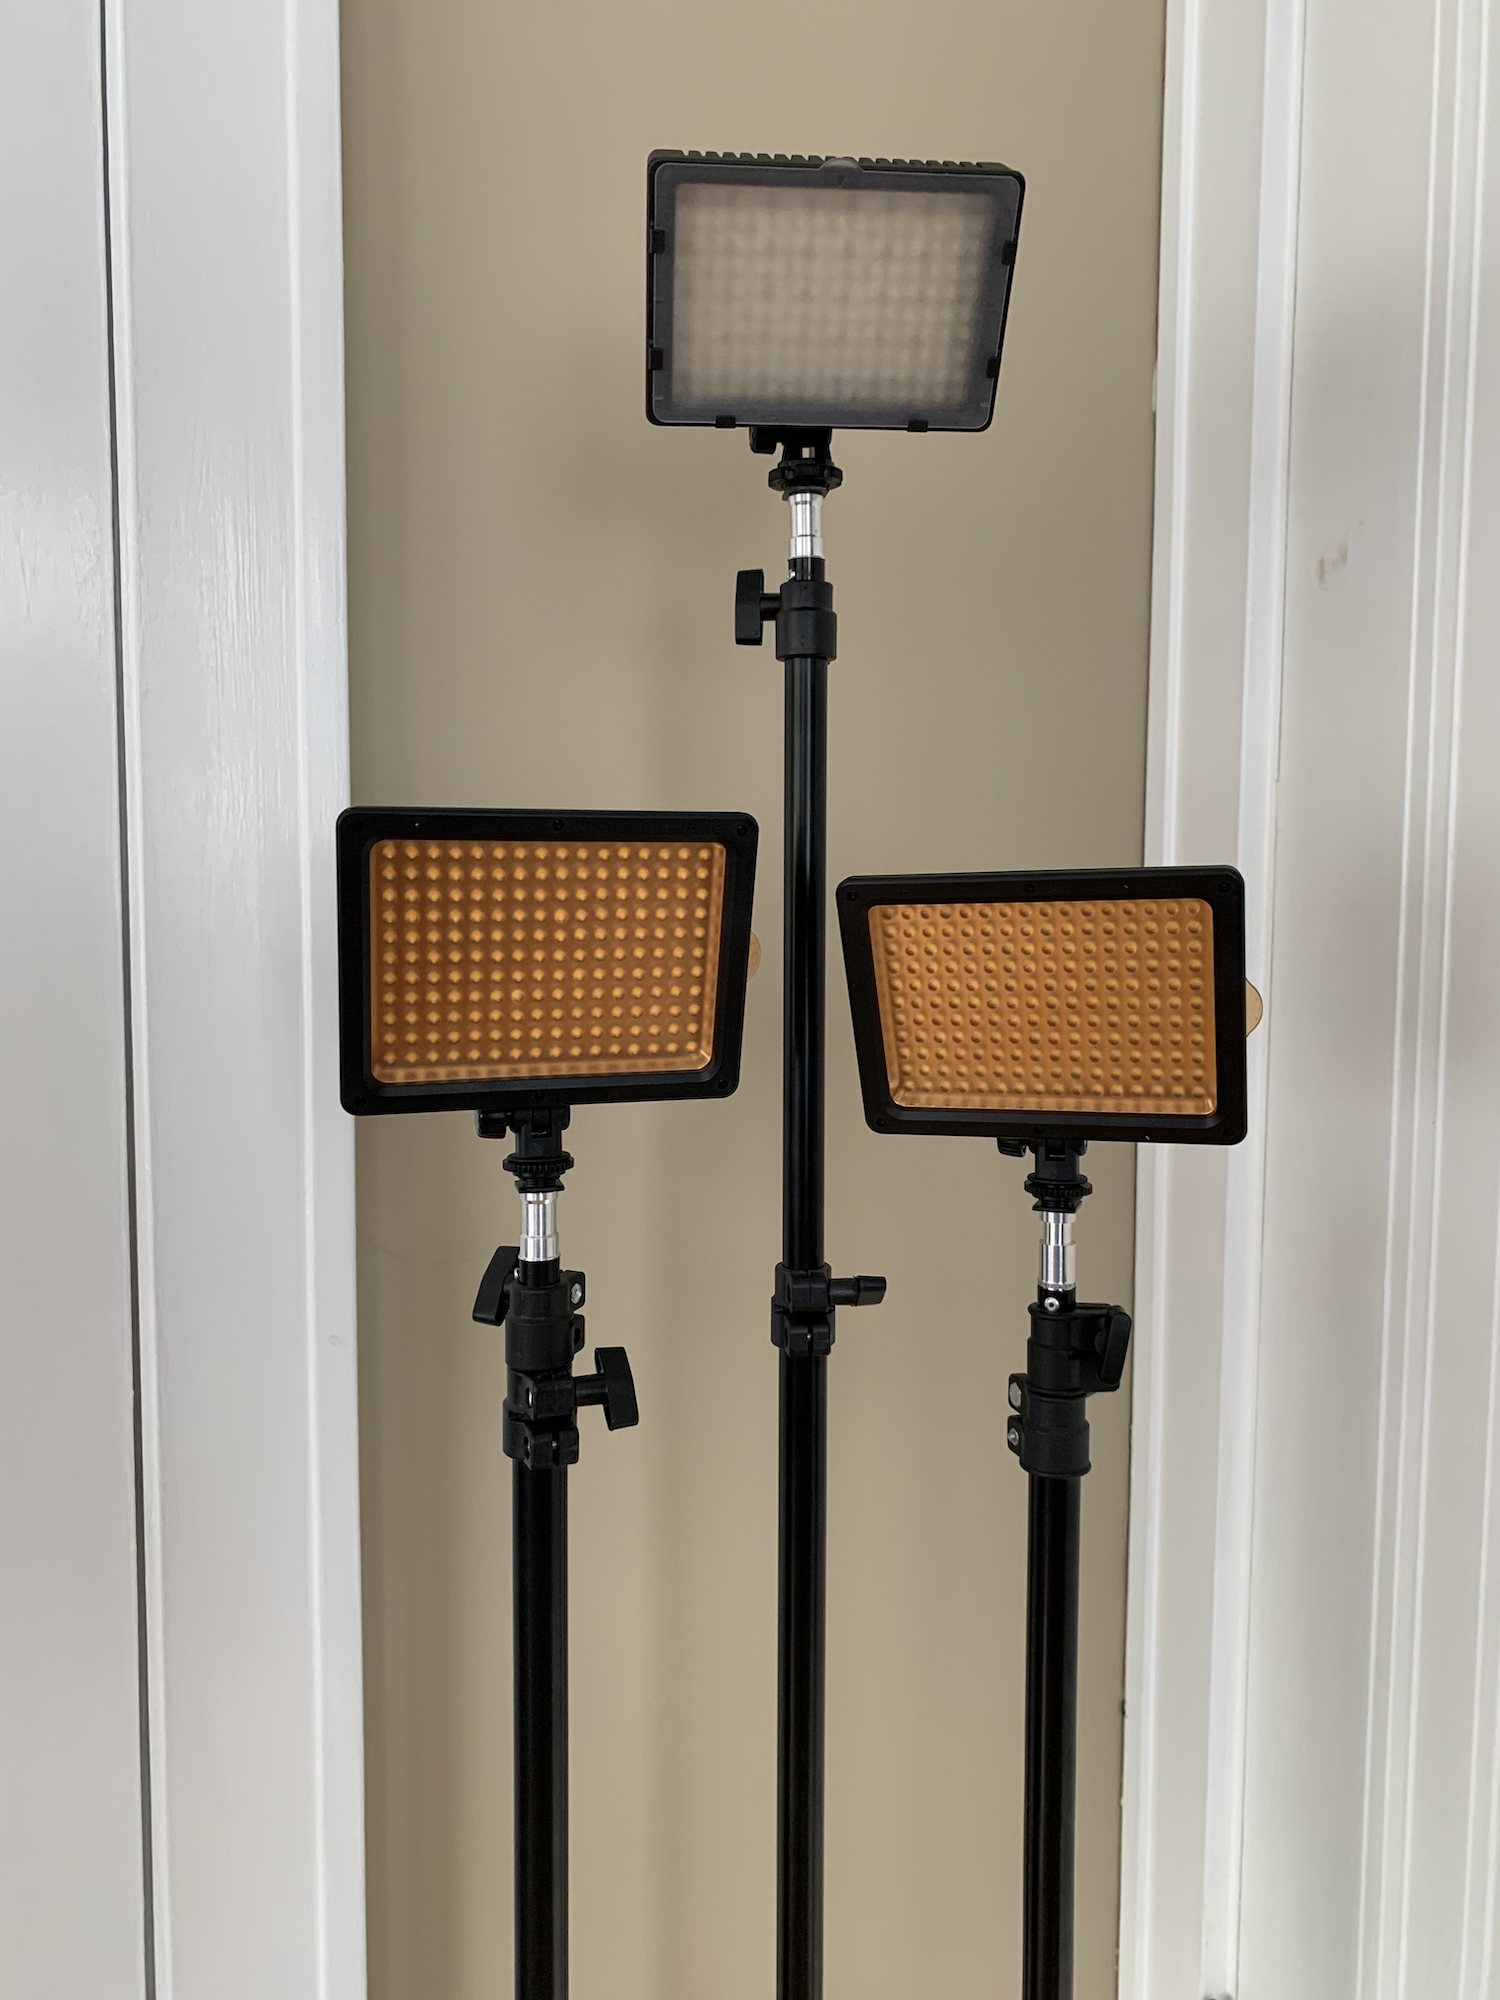
3 point lighting kit - Neewer Double LED Video Light
When I first got into video, I mostly used natural light and a few well placed office lamps to light my videos. Then I bought a pretty standard starter 3 point lighting kit. (I actually started out by getting the 2 point lighting kit, but very quickly bought a third light and have loved having all 3 for lighting flexibility.)
Here’s an article of recommendations for good lighting buys for a smaller budget.
This was one of the cheapest, yet most essential purchases I’ve ever made. This flimsy little card helps you to adjust your white (or gray) balance in your shot before you begin filming. Now, of course you’re going to ask me “what’s white balance?” and I’m not really gonna have a sophisticated answer for you, but, just…it’s physics okay?
In all seriousness, adjusting your white balance before filming is one of the quickest ways you can make your shot look that much more professional. It helps to make sure your subject doesn’t look washed out, or too dark. Basically, snapping a photo of this card in the context where you’ll be filming, and then adjusting the setting on your camera, helps your shot look cleaner and more color balanced.
Audio
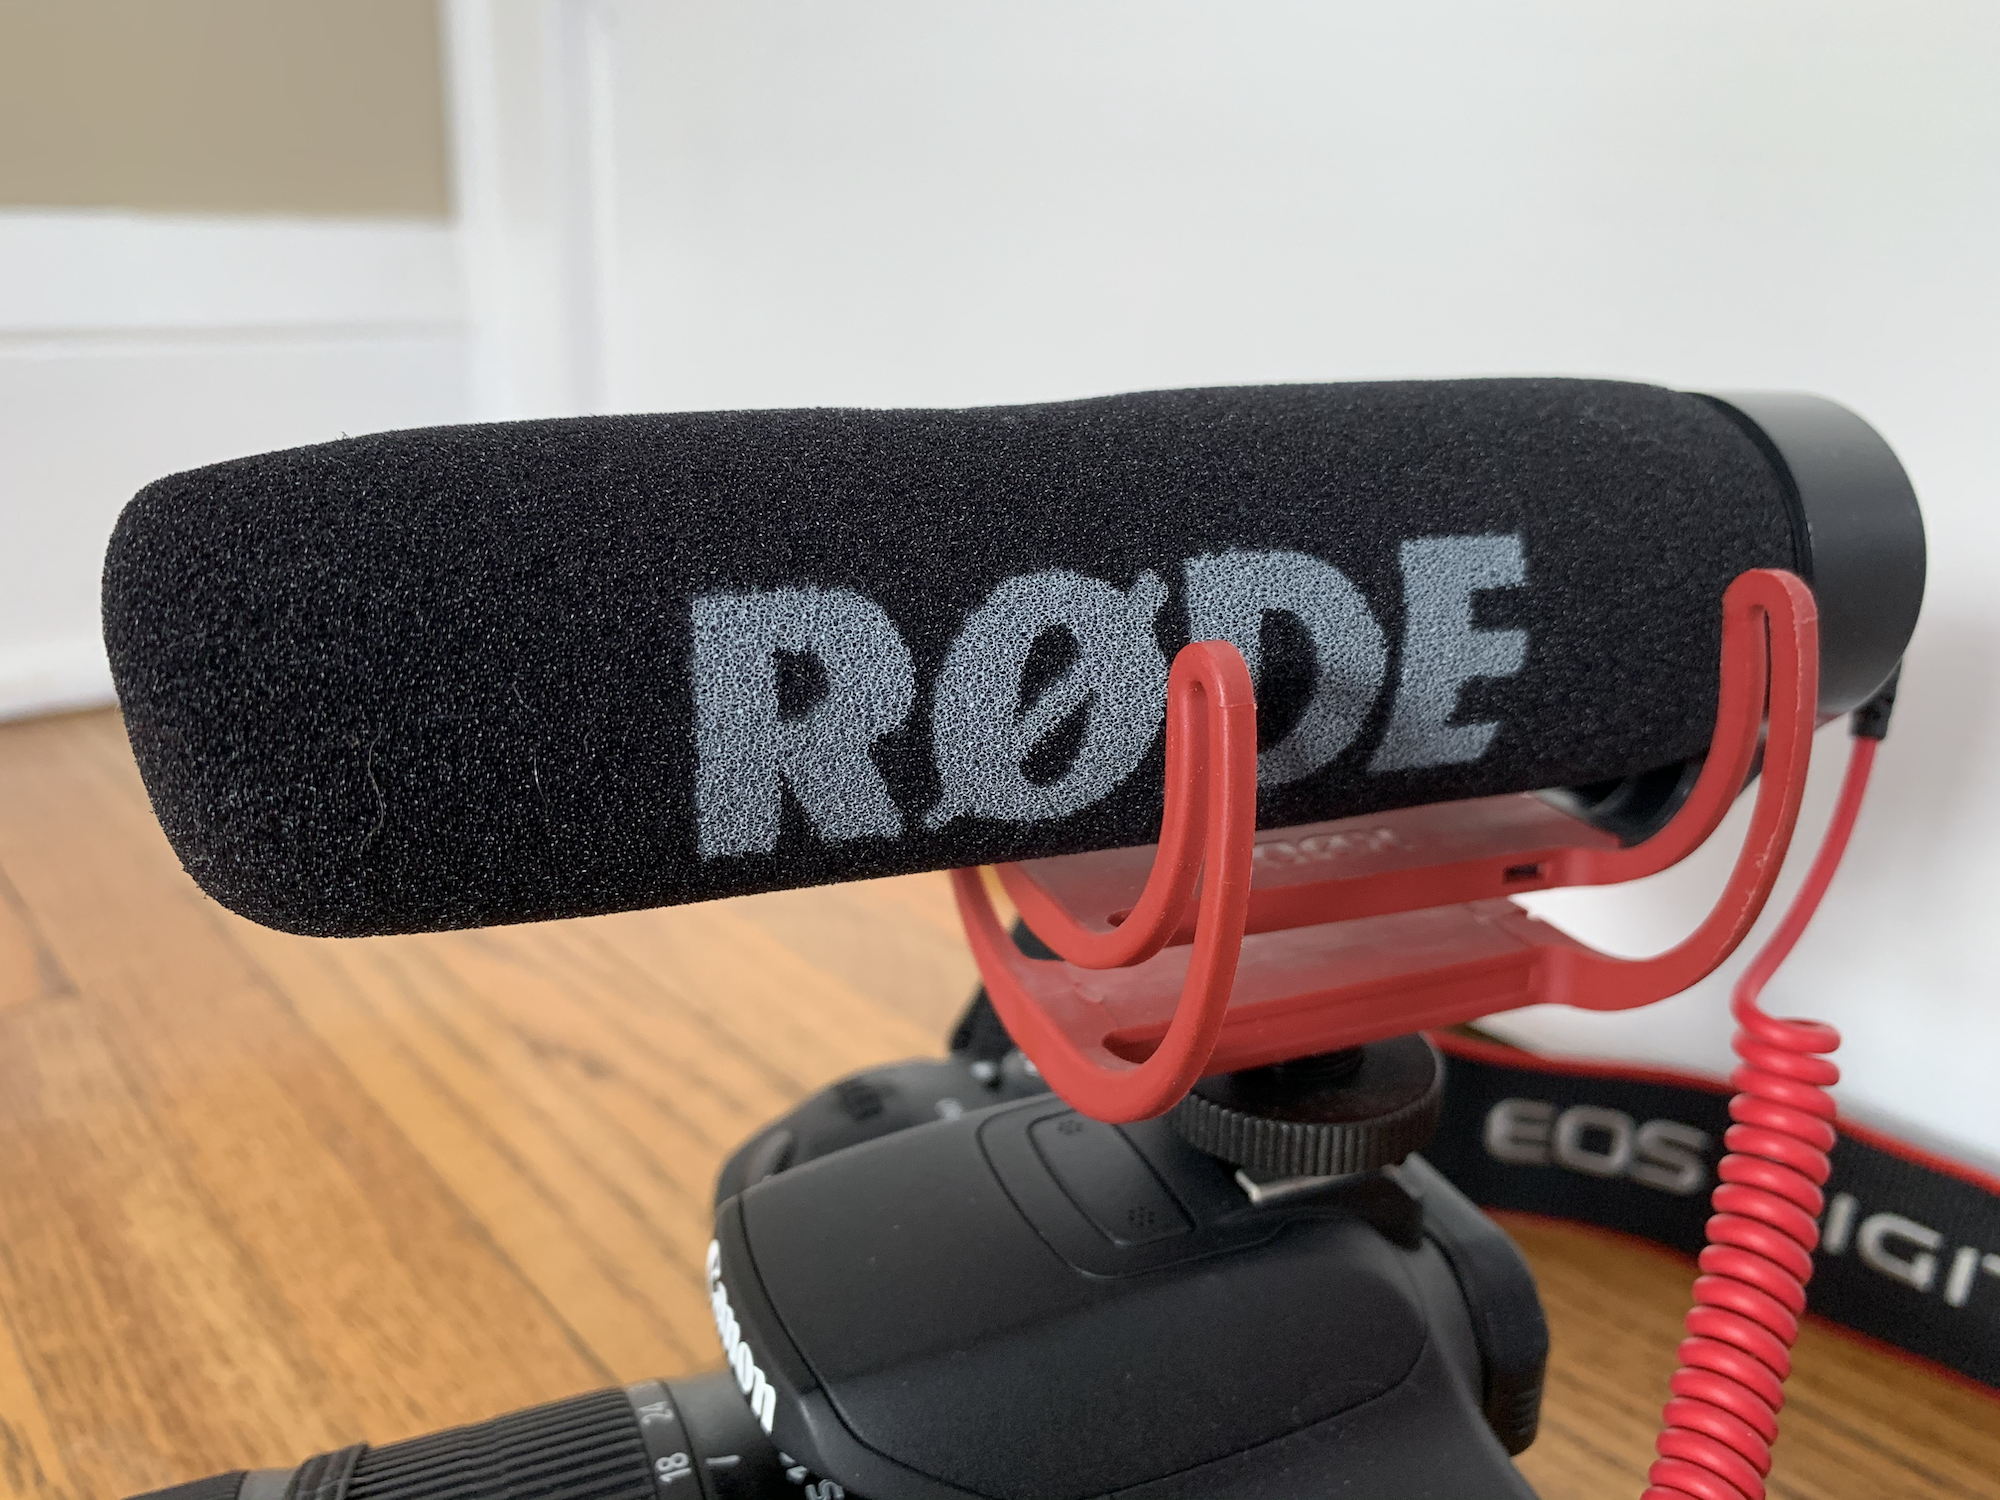
Rode VideoMic GO Lightweight On Camera Microphone
When I first started filming, I wanted to be able to do all my video and audio in one for the sake of ease. So, I started off with this Rode directional mic that hooked into my DSLR. It’s been a great mic for me, both early on, and now as a back up audio source for if things go wonky with my other audio options. It’s also great for filming b-roll when you want to capture some good quality ambient noise from the surroundings - like the din of a busy conference hall, or the sound of birds outside your window.
I bought the Blue Yeti USB mic a few years ago to try out a different audio source when making my videos. Though I’ve moved away from using it in videos, I use it ALL THE TIME when it comes to podcasting. It’s so easy to use. Plug it in to your USB port on your computer, and you’re good to go!
It’s a great mic to have, especially for things like livestreams, or other course recording kinds of content - great quality audio for a not too terrible sticker price!
Pro Tip: Get a pop filter (the black round thing in the photo here) to prevent those pesky ‘p’ sounds from POPPING in your audio tracks…
New Audio Toy! Zoom H4N Pro Portable Audio Recorder
A few weeks ago, as an end-of-year present to me/my business, I bought the H4N Pro Portable Audio Recorder so I can up my audio game when filming interviews with multiple audio sources. This baby will let me adjust some of the sound levels on the go, which is a little harder with some of the more rudimentary apps. I’m sure it has a zillion other features I’ll learn more about as I play around with it too, but needless to say, I’m excited to use it on my next filming gig!
Apps & Editing Software
The big (and spendy) two:
Final Cut Pro X
I’ve used Final Cut Pro X ever since abandoning iMovie lo those many years ago. I generally really like its user interface, and though it takes a while to figure out things like motion graphics and text settings, once you get the hang of it, it’s pretty great. It’s not for the faint of heart though, so I’d recommend either looking at a few tutorials (there are SO MANY online) or doing a little poking around in the program on a trial basis to practice first.
Adobe Premier
I have colleagues who swear by Adobe Premier, though I’ve never used it. Premier lovers love the way you can do animations and motion graphics, and appreciate the flexibility of the platform. Again, never tried it myself, but other professional creators adore it.
Free software
I’ve used iMovie, which comes standard on Mac computers, and I know others have used Windows Movie Maker (which comes standard on many PCs). Now YouTube also has its own video editor built in, so you can do some basic editing on YouTube itself if that’s more your speed. Here’s a nice article reviewing some of the other free software options available in 2020.
Other goodies
Tripod
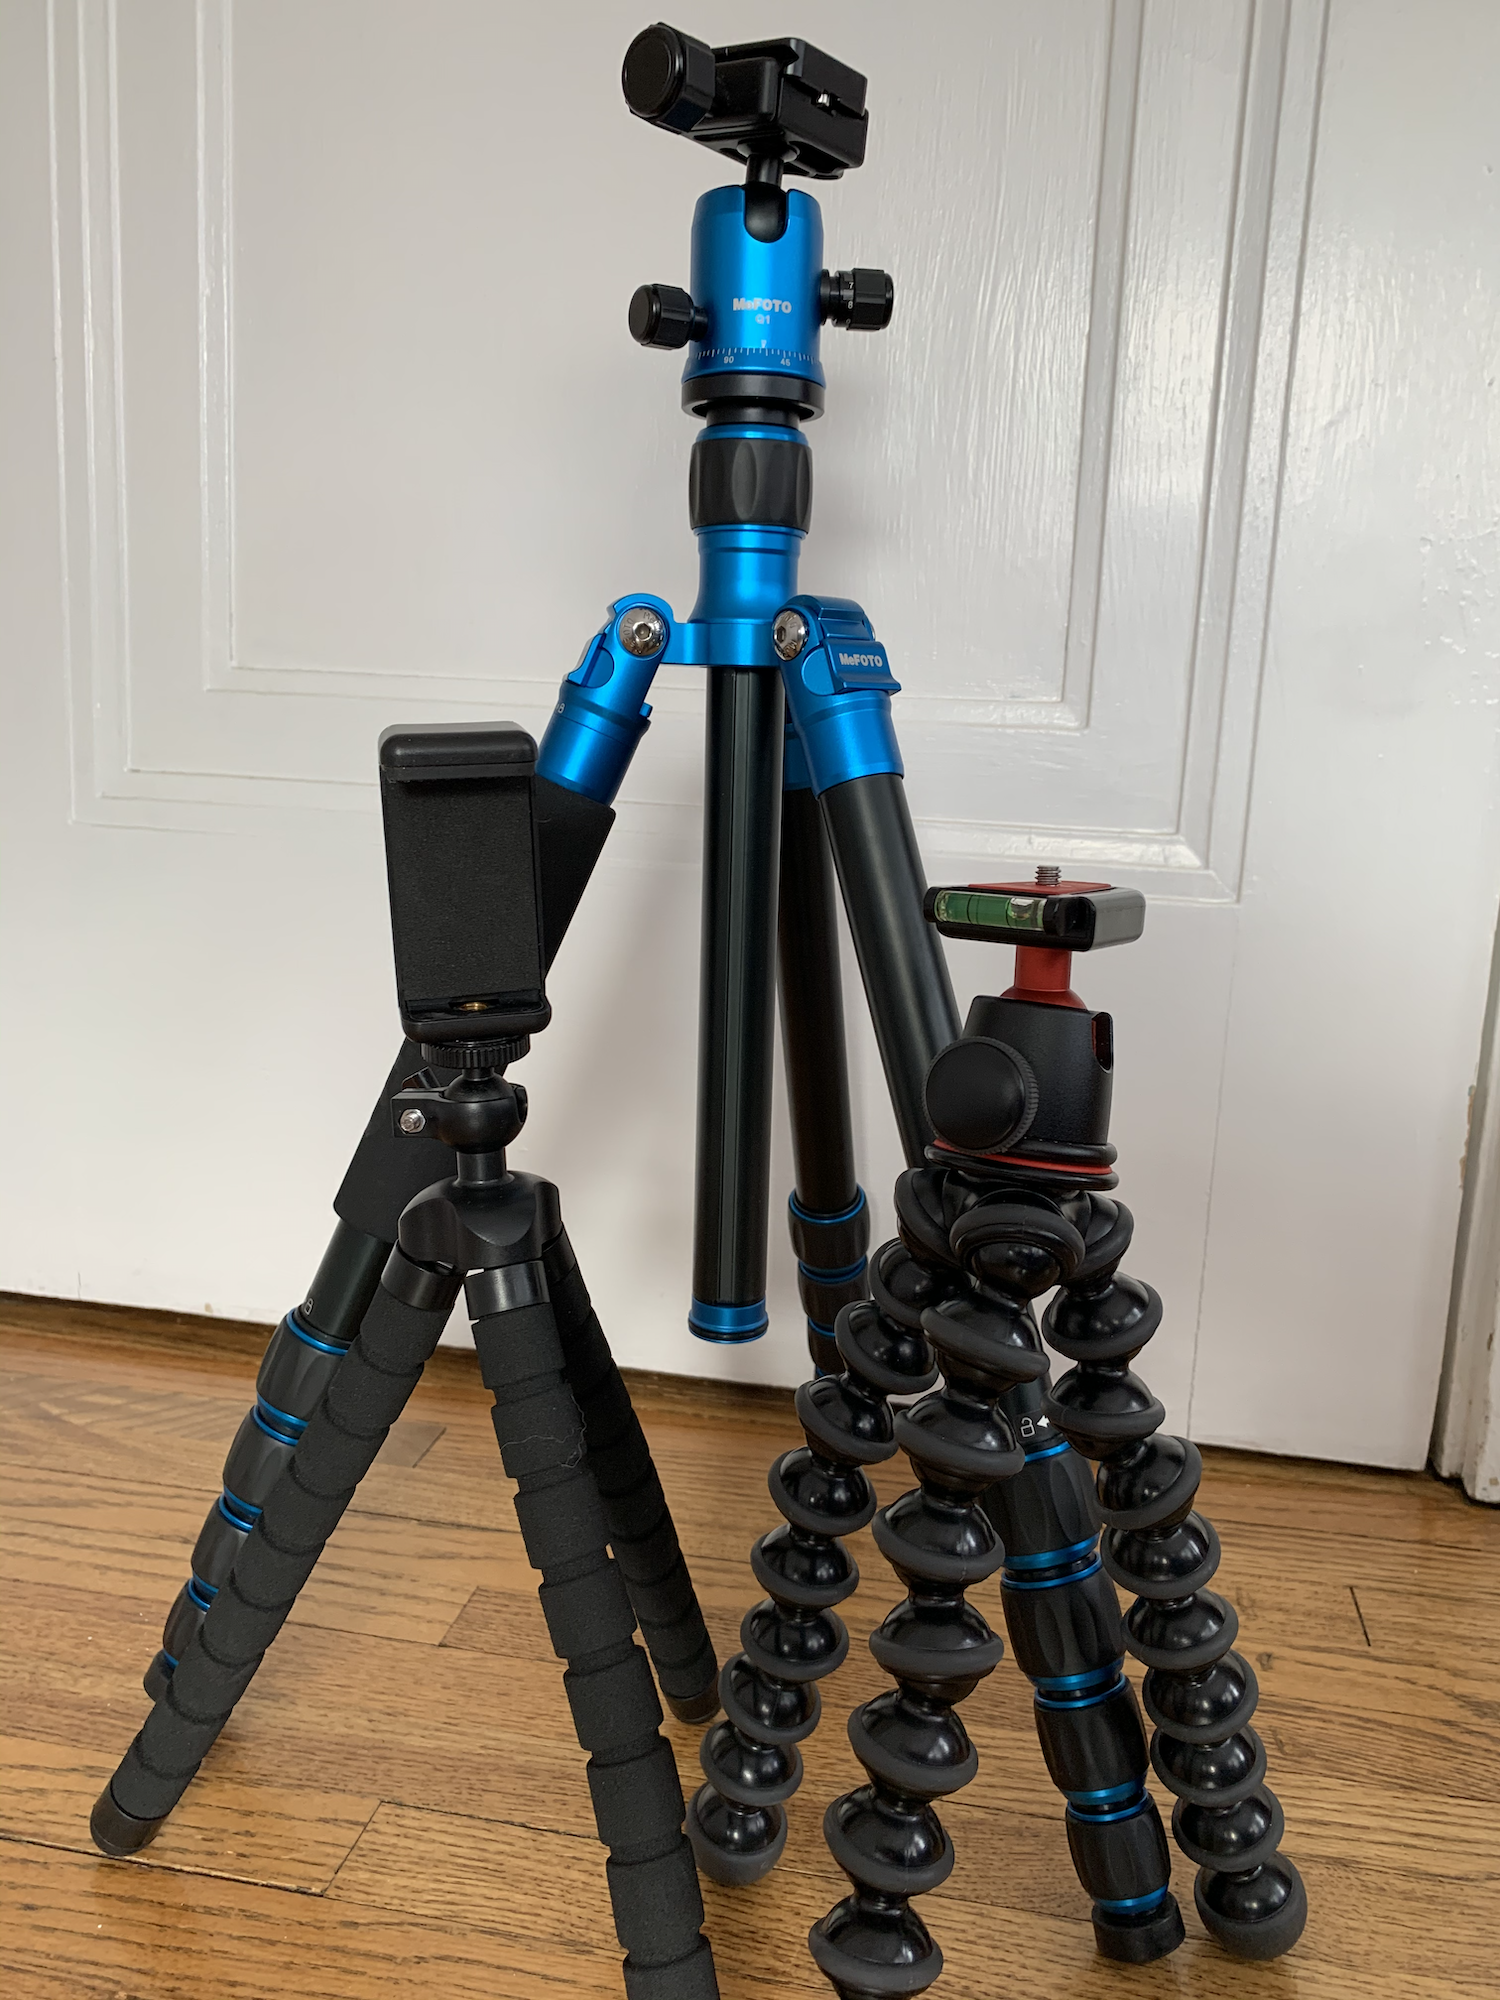
I talked about the iPhone version of this earlier in this article, but for those of you buying a DSLR or something comparable, it’s a good idea to get a sturdy tripod (or two!) to make sure your camera is steady and level.
I’ve got a couple different ones - one I use in my home office shoots, and the other is a tad smaller and more portable for taking on the go for filming on location.
This photo also features the little portable one for my iPhone when I take that on location as well.
Portable Hard Drive
Oh sweet, sweet portable hard drive. Where would I be without you?
Nowhere. That’s where.
Seriously, one of the best investments you can make for your video-making is getting a small external portable hard drive to store all your video and editing files on. Video files can be quite large, and they’ll eat up your computer’s hard drive space frighteningly fast. But if you put everything on your external portable hard drive, you’ll save your precious computer hard drive space, and can still take your editing with you on the go.
SD Cards
Pro Tip: Always have at least 2 SD cards for your camera available when you’re on a shoot. Nothing is worse than running out of storage space on your camera while you’re trying to finish filming something. NOTHING.
They’ve come down a lot in price over the last couple of years. I got this one which has 64GB of storage for about $20 on Amazon a few weeks ago.
Extra batteries & chargers
I have never been sad to have a couple extra camera batteries and chargers around. (Because the SECOND worst thing is running out of battery power when you’re filming…) Be sure to check what type of battery you need for your camera, but I got this 4 pack of batteries and an extra charger for about $25 on Amazon a while back.
Teleprompter
If you’re the type of person who doesn’t feel comfortable on camera without being able to read directly from your script, you might want to consider a teleprompter. But there’s bad news, and good news.
The bad news is that teleprompters are SO EXPENSIVE.
The good news is that with an iPad, a teleprompter app, and a tiny bit of craftsmanship, you can create your own DIY teleprompter for about $35 (assuming you have an iPad or tablet already).
This is a video that shows how to build the one I made several years ago.
However, I am NOT very handy, so mine turned out REALLY janky, but it worked for what I wanted it to do (and if you are a little more crafty than I am, then I’m sure you’ll be fine.) 😆
So those are the pieces of equipment I’ve used to varying degrees over the years. There are some things I should add to my collection over the next year or so (4K camera for example) to really up my video game, but for now, these things help me make video, my way.


